I'm really excited because I can cross off another item on my "List of 8 Things To Do In The Next 12 Months". My goal was to get two or three of these items done by Thanksgiving, and I am happy to report I've officially completed two! Yay for setting and keeping goals! You can read about the first item I completed on the list here.
I am really happy with the way our bathroom mirror frame has turned out so I thought you might enjoy a tutorial on how it was done.
First things first, here are the supplies you will need:
1. Trim/wood. We went with a trim that had the look of wood but is much easier to work with because it is virtually weightless. I have no idea what it is made out of but it is almost soft on the back side, like Styrofoam, but hard on the front, like wood. It was very inexpensive, I think about $12 for the three pieces we needed to make the frame. We found it in the trim section at Lowe's. Make a point to pick trim that looks straight and level. It is normal for wood and trim to be somewhat warped, but the less warped the better in this case.
2. Caulk gun. Like this:
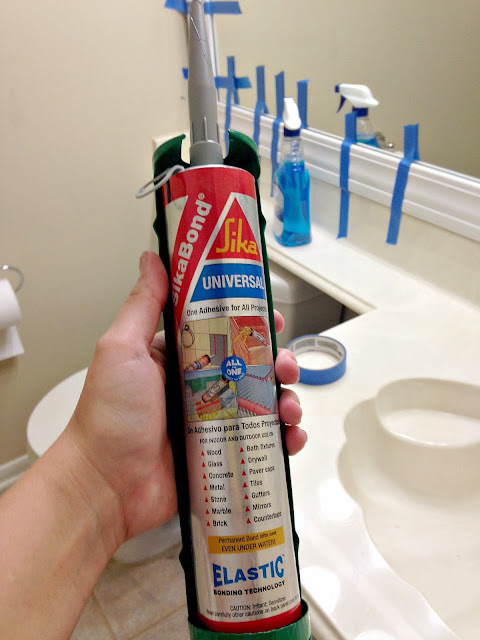
3. Mirror glue. Like this:
3. Miter saw or box. My father-in-law was kind enough to cut our edges for us using his miter saw.
4. Paint, painters tape and paint brush.
5. Caulk.
Ok, now you've got your supplies, onto the actual construction of the frame!
Step 1. Measure your mirror (twice!) before cutting your frame to the correct size. We intentionally made our frame about a half inch too long and a half inch too tall so that it would hang over the outside edges of the mirror just a tiny bit and keep the edges looking clean and finished. I recommend that you do the same thing if you tackle this project. If you want your corners to meet at a 45 degree angle, this is where your miter saw or box will come into play.
Step 2. Paint the trim. You should now have four individual pieces of trim. Assuming your mirror is a rectangle, you should have two long pieces and two short pieces. Now is the time to paint your trim whatever color you like. Be sure to paint the back side of the trim as well because you will be able to see the back of the trim in the tiny reflection the frame will cast on the mirror. That is a small detail, but it will make your project look more professional when it is all said and done! I wanted our frame to be white and because I am cheap thrifty, I chose to use leftover paint from our kitchen cabinet makeover (read about that here).
Step 3: Once your paint has completely dried, it is time to hang your frame. Whip out your handy dandy caulk gun and mirror glue and go to work. The glue we purchased takes two hours to dry, so be sure to add painters tape to the frame to hold it securely in place until the glue dries. Also, be warned, this mirror glue stuff is really sticky, so try and work as neatly as possible or you'll find yourself with a mess on your hands (not that we know this from experience or anything, lol!). When you add your glue to the back of your trim, be sure not to get the glue too close to the edges. For one, if its too close to the edges it may seep out when you press it flat against the mirror. For two, if you get the glue too close to the edge, you'll be able to see it in the tiny reflection on the mirror. Again, this is another small detail that will help your project look polished when it is all said and done!
Here is one small section of our mirror where we accidentally got the glue too close to the edge of the trim. If you look closely, you'll see the glue reflected off the back of the trim. Oops!
At this stage, your mirror should look something like this:
Step 4: Caulking the corners. Wait until the glue has completely dried before moving onto this step. We waited a full 24 hours, just to be safe. Unless you are a seasoned pro with a miter box, it is likely you'll notice your 45 degree angle corners do not meet up 100% perfectly. (SIDE NOTE: my father-in-law happens to be a seasoned pro, so our corners were nearly perfect). Here is what ours looked like:
Pretty close to perfect, but you could still see the crack. Again, whip out your caulk gun and caulk (NOT glue) to fill in those tiny cracks. This will make the corners of your frame look finished and completely perfect.
Step 5: Touch up the paint. Your frame may get a little dinged or dirty while you are working on it (remember how I mentioned earlier that the mirror glue tends to make a mess?) so make sure you have enough paint left over to do a final touch up coat.
And... voila! You've got yourself a custom framed bathroom mirror!
I'm very happy with the results of this project. Each small change takes our home further away from 1980's builder grade and one small step closer to custom! Good luck with your mirror framing endeavors!
Thanks!
Jesse


No comments:
Post a Comment
I'd love to hear from you!